
Every winter, water sneaks into tiny cracks and gaps in your roofing materials, then expands as it freezes and contracts as it thaws. This constant push and pull happens dozens of times each season, quietly stressing your shingles, flashing, and decking in ways most homeowners never notice until a leak appears. Understanding how this cycle works can help you catch damage early, budget for repairs, and avoid a surprise emergency during the next cold snap. This guide breaks down exactly what freeze-thaw cycles do to your roof and what you can do about it.
The Science Behind Freezing Water and Roofing Materials
Water is unusual because it expands by roughly nine percent when it freezes, and that expansion generates real force — studies estimate the pressure exerted by expanding ice can reach upwards of 2,000 pounds per square inch under the right conditions. When moisture works its way under shingles or into small cracks in roofing cement, freezing turns that trapped water into a wedge that pries materials apart. This is the same mechanical process that splits boulders and buckles pavement, just operating on a smaller, quieter scale across your roofline.
As temperatures rise during the day and drop again at night, the cycle repeats, gradually widening every weak point it touches. Flashing seams, nail holes, granule loss on shingles, and hairline cracks in sealant are all common entry points where moisture collects before a freeze. Once ice forms in one of these spots, it doesn’t just push outward evenly — it tends to exploit the weakest surrounding material, so damage often spreads unevenly and worsens fastest around existing repairs or aging patches.
Over a single winter, a roof in a cold climate might endure dozens of these freeze-thaw cycles, sometimes more than fifty, depending on regional weather patterns, each one doing a little more damage than the last. Because the effects are cumulative rather than sudden, a roof can look fine on the surface for years while its underlying structure quietly loses integrity. By the time cracks or leaks become visible, the material underneath may already have absorbed dozens of these micro-fracturing events.
Water expands roughly 9% in volume when it freezes, and that expansion generates enormous localized pressure—often cited at around 2,000 pounds per square inch under confined conditions. Roofing materials are never designed to withstand that kind of force from the inside out. This is why roofs in northern states often show wear years before similar roofs in milder climates, even when installed with the same materials and by the same crews.
The damage is cumulative and often invisible from the ground, which makes it easy to underestimate. A single freeze-thaw cycle might do nothing more than widen a seam by a fraction of a millimeter, but a typical winter in a cold-climate region can bring 30 to 60 such cycles as temperatures swing above and below freezing overnight. Multiply that across several winters, and what started as an imperceptible flaw becomes a genuine structural weak point.
Small issues like a lifted shingle edge, a hairline crack in flashing sealant, or a pinhole in underlayment can become major problems after just a few seasons of repeated freezing and thawing. Water that seeps into these openings during a thaw has nowhere to go once temperatures drop again, so it freezes in place and forces the gap wider. Over time, this same mechanism is what drives ice dam formation, granule loss on asphalt shingles, and the slow separation of flashing from roof penetrations like chimneys and vents.
Warning Signs of Ice Damage on Your Roofline
Ice dams are one of the most visible symptoms of freeze-thaw stress, forming when heat escaping from your attic melts snow on the upper roof while the eaves stay frozen. The resulting water has nowhere to go, so it backs up under shingles and seeps into the roof deck. This trapped moisture can rot wood, stain ceilings, and create the perfect environment for mold growth inside your attic space.
Beyond ice dams, there are subtler clues that freeze-thaw cycles are taking a toll on your home. Catching these early often means the difference between a minor fix and a much larger repair bill.
- Granules are collecting in gutters or at the base of downspouts
- Shingles that appear cupped, curled, or cracked along the edges
- Water stains are spreading across interior ceilings or upper walls
- Icicles are forming in unusually thick clusters along the eaves
- Soft or spongy spots are noticeable when walking near the roofline
Why Asphalt Shingles React Differently to Cold Weather
An asphalt shingle roof is one of the most common residential roofing choices because it balances affordability with reasonable durability, but cold weather exposes its limitations. The asphalt binder that holds shingles together is petroleum-based, and like most petroleum products, it stiffens as temperatures fall. Below roughly 40°F, shingles lose much of their natural flexibility, meaning the same wind gust or foot traffic that would cause a summer shingle to bend harmlessly can cause a winter shingle to crack outright.
Repeated freezing and thawing accelerate the loss of the protective granules that shield shingles from UV rays and moisture. Water that seeps into tiny surface cracks expands by about 9% when it freezes, prying granules loose and widening existing fractures with each cycle. Over a single winter in a climate with frequent thaw-refreeze patterns, a roof can experience dozens of these expansion-contraction cycles, each one stripping away a bit more of the shingle’s protective layer.
The damage compounds in specific ways worth watching for: granule loss shows up as dark, bald patches or excess grit in gutters, while brittleness often reveals itself as curling edges or a network of fine cracks visible from ground level. Roofs facing north, which get less direct sun to help shingles thaw evenly, tend to show this wear first. Left unaddressed, these small failures become entry points for water intrusion long before homeowners notice any obvious leak.
Asphalt shingles behave differently depending on temperature because the asphalt itself stiffens in the cold and softens in the heat. Manufacturers actually rate shingles for performance in different climate zones, with cold-weather products formulated to stay more flexible and resist cracking when temperatures repeatedly dip below freezing. Some brands even specify a minimum installation temperature, often around 40°F, because shingles applied in colder conditions may not seal properly.
Installation techniques matter just as much as the product itself. Proper attic ventilation prevents warm indoor air from melting snow on the roof, which can refreeze at the eaves and form ice dams that force water beneath the shingles. Sealing details around vents, flashing, and valleys are equally critical, since these are the points where trapped moisture most often finds its way in during repeated freeze-thaw cycles.
A roof installed without proper attention to these details is far more vulnerable to freeze-thaw stress, regardless of the shingle brand or quality. Even a premium architectural shingle can fail early if nailed incorrectly or installed over inadequate underlayment. This is one reason homeowners in colder regions are often advised to choose products specifically rated for temperature swings, such as those with reinforced fiberglass mats, rather than simply opting for the cheapest available option.
How Attic Ventilation Influences Ice Dam Formation
Poor attic ventilation is one of the biggest hidden contributors to freeze-thaw damage, because it allows warm air to escape upward and melt snow unevenly across the roof surface. A well-ventilated attic stays closer to the outdoor temperature, which keeps snow melting at a consistent rate instead of creating the uneven melt-and-refreeze pattern that forms ice dams. Balanced ventilation, combining intake vents at the eaves with exhaust vents near the ridge, is one of the most effective long-term defenses against this problem.
Insulation plays an equally important role alongside ventilation. If warm air from living spaces leaks into the attic through gaps around light fixtures, chimneys, or attic hatches, it undermines even a well-designed ventilation system. Sealing these air leaks and adding adequate insulation depth are often more cost-effective than any roofing product upgrade when it comes to preventing ice dams.
The Hidden Cost of Delaying Small Roof Fixes
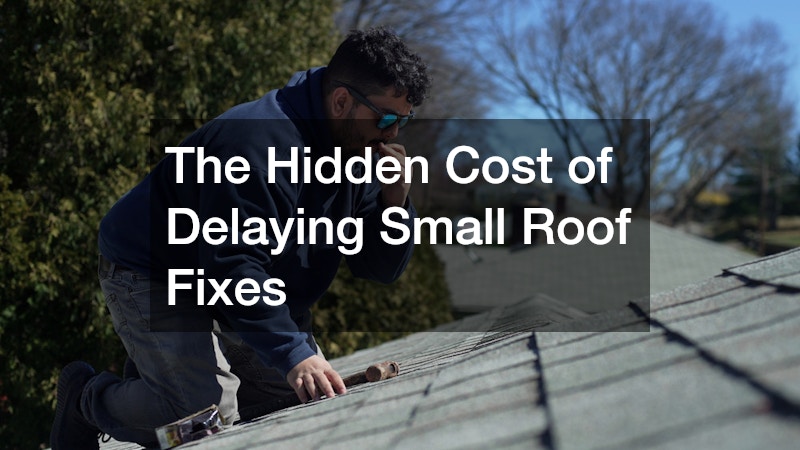
A small crack or lifted shingle might not seem urgent, but freeze-thaw cycles turn minor flaws into major vulnerabilities remarkably fast. Water that infiltrates a tiny gap in the fall can freeze repeatedly through winter, widening the opening with each cycle until spring rains find an easy path into your attic. What could have been a simple patch often becomes a much larger and more expensive repair by the time warmer weather reveals the full extent of the damage.
This is why timely roof repairs matter so much in climates with harsh winters. Addressing small issues before the first hard freeze can prevent them from compounding into structural damage that affects insulation, drywall, and even the framing underneath. A quick seasonal inspection in early fall is one of the most cost-effective habits a homeowner can adopt, and having a qualified roof contractor handle that inspection ensures subtle warning signs don’t go unnoticed.
What Happens Underneath the Shingles During a Thaw
The roof deck, usually made of plywood or oriented strand board, absorbs moisture that seeps past damaged shingles or flashing. During freezing temperatures, the trapped moisture expands within the wood fibers, and repeated cycles gradually weaken the material’s structural integrity. Over time, this can lead to soft spots, sagging, or delamination that is not visible until someone walks across the roof or removes shingles for a closer look.
Flashing around chimneys, vents, and skylights is especially vulnerable because it relies on sealant that can shrink and crack in cold weather. Once a seal fails, water finds its way behind the flashing and repeats the freeze-thaw damage cycle in a concentrated area. Regular inspection of these transition points is essential since they tend to fail well before the surrounding shingle field does.
Choosing Materials Built for Repeated Freezing
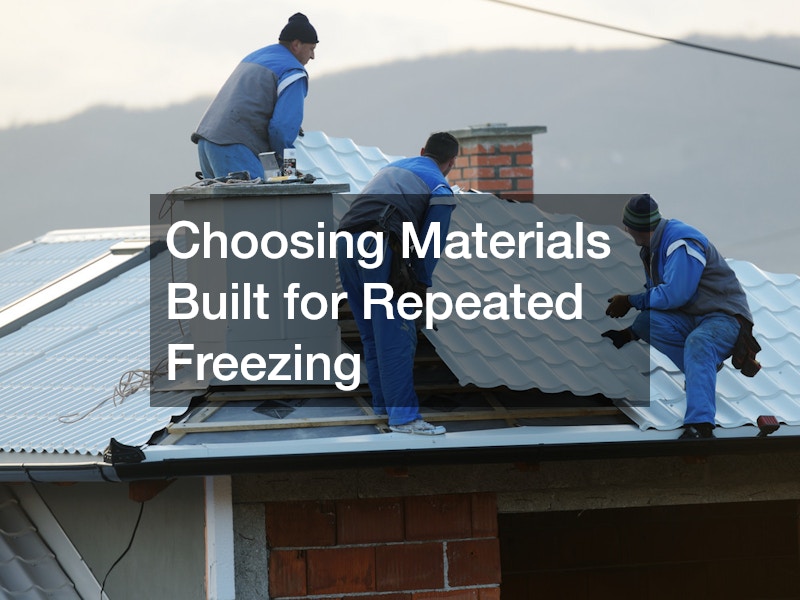
Not all roofing materials handle freeze-thaw stress equally well, and homeowners planning a roof replacement should factor climate resilience into their decision alongside cost and appearance. Metal roofing, for example, sheds snow and ice more efficiently than shingles, reducing the amount of standing moisture that can seep into seams. Synthetic and rubber roofing products also tend to remain more flexible in cold temperatures compared to standard asphalt.
Underlayment choice matters just as much as the visible roofing surface. A high-quality synthetic or self-adhering ice-and-water shield underlayment provides an extra layer of protection in areas most prone to ice dam formation, such as eaves and valleys. Investing in better materials during roof installation often costs less over the life of the roof than repeatedly patching a system that was never suited to harsh winters in the first place.
- Metal roofing for superior snow and ice shedding
- Synthetic underlayment rated for cold flexibility
- Ice-and-water shield membranes at eaves and valleys
- Impact-rated shingles designed for temperature extremes
- Properly sealed flashing systems around penetrations
When to Call in a Professional for an Inspection
While some warning signs are visible from the ground, a thorough evaluation often requires climbing onto the roof and checking areas that are easy to miss, like valleys, flashing seams, and vent boots. Bringing in experienced roof specialists for an annual or biannual inspection can catch problems long before they turn into leaks or structural damage. Professionals also carry the safety equipment needed to inspect steep or icy roofs without risking a fall.
Searching for local roofers who specifically understand freeze-thaw damage in your region is worth the extra effort, since climate-specific experience matters more than generic roofing knowledge. A trustworthy inspection should include documented notes on existing wear, photos of problem areas, and a clear written summary of findings before any work is recommended. This transparency helps homeowners make informed decisions rather than feeling pressured into unnecessary repairs.
How to Compare Roofing Companies Before Hiring
Not every roofing business has equal experience with cold-climate damage, so it pays to ask specific questions before signing a contract. Reliable roofing services should include a detailed written estimate, proof of licensing and insurance, and references from recent local jobs. Homeowners should also ask how a company handles warranty claims, since freeze-thaw damage sometimes takes a full winter season to reveal itself after a repair.
Getting quotes from a few local roofing companies allows for a fair comparison of pricing, materials, and communication style. It also gives homeowners a chance to gauge how thoroughly each contractor explains the cause of the damage rather than just the proposed fix. A company willing to walk through the freeze-thaw process and explain their recommended solution in plain language is usually a good sign of genuine expertise.
- Request written estimates that itemize materials and labor
- Verify licensing, insurance, and manufacturer certifications
- Ask for references from recent cold-climate roofing projects
- Compare warranty terms, especially for weather-related claims
- Notice how clearly each contractor explains the underlying problem
Freeze-thaw cycles are a slow, quiet threat that can shave years off a roof’s expected lifespan if left unaddressed. By recognizing the early warning signs, improving attic ventilation, and choosing materials suited to harsh winters, homeowners can significantly reduce the damage these seasonal swings cause. If you notice any of the symptoms described here, schedule an inspection before the next cold season sets in, rather than waiting for a leak to force the issue. Taking action now is the simplest way to protect your investment and extend the life of your roof for years to come.